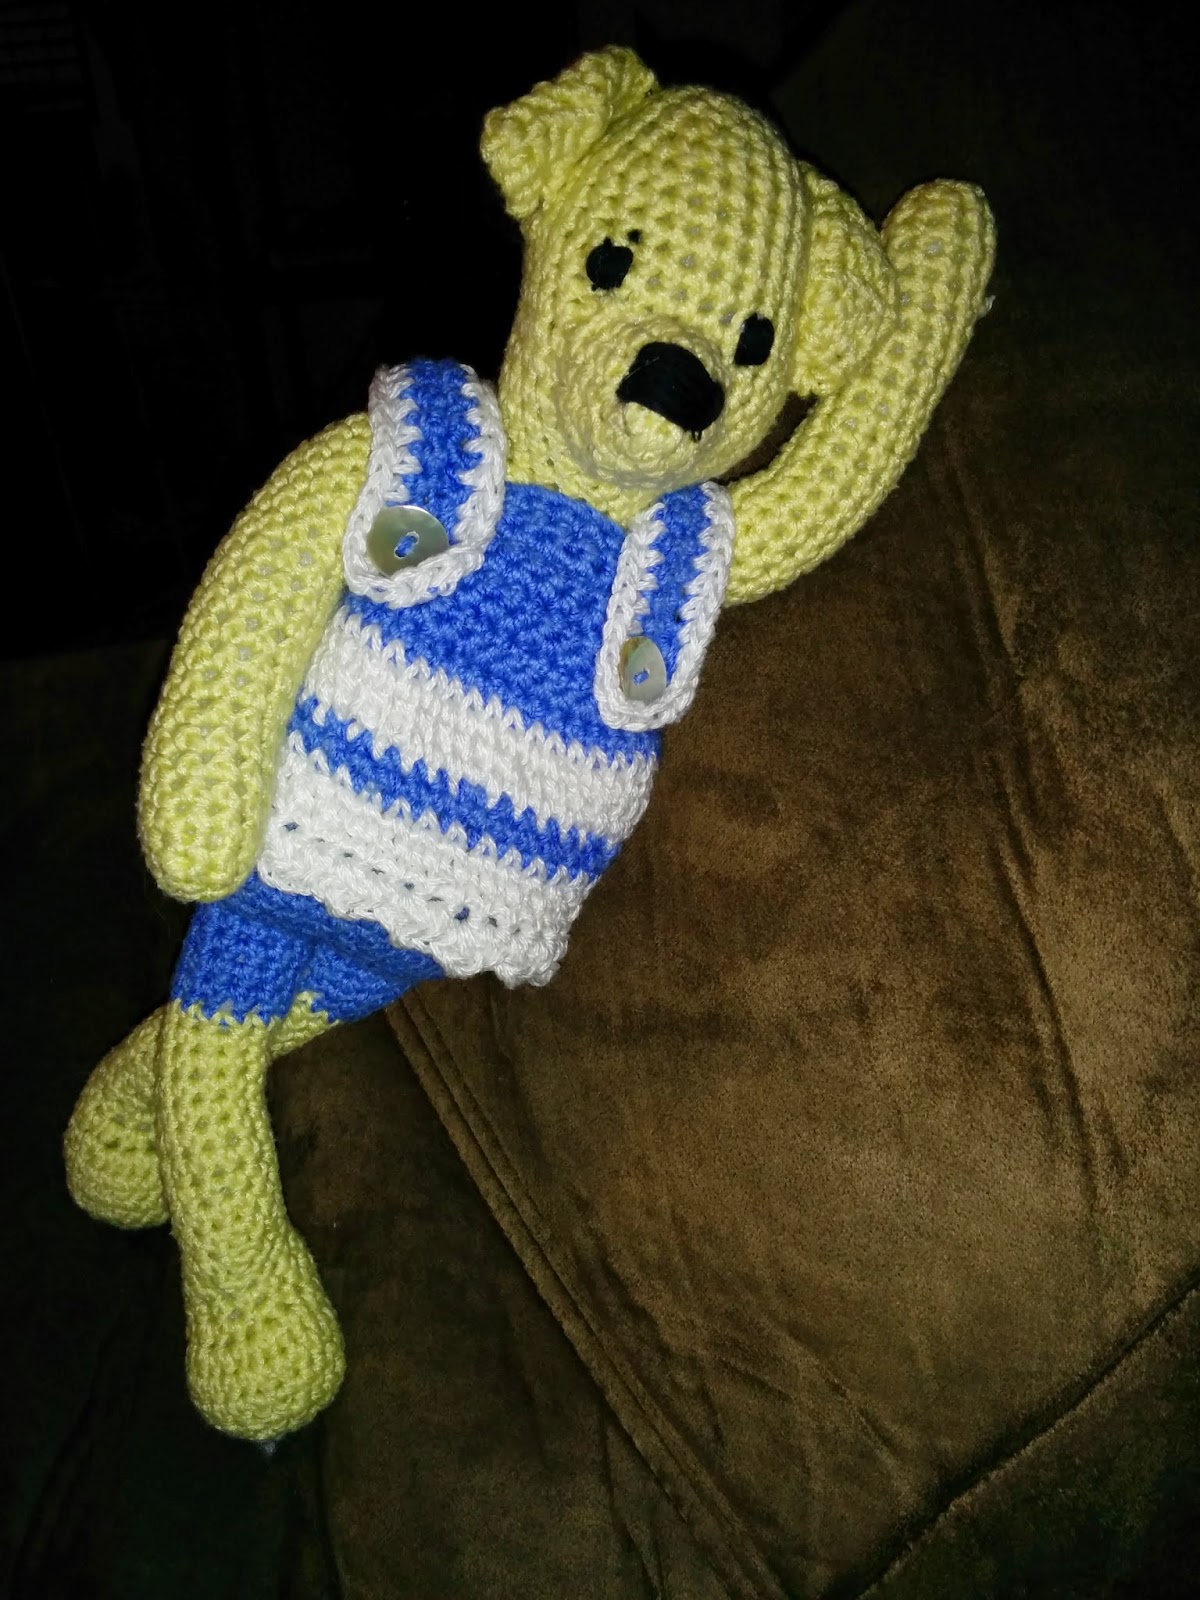
I started her up in some cotton that I was trying to use up. Probably not the best choice for a doll, for as I continue to make such things over the years, I get more picky about the stuffing showing through/the stitches not being tight. You can see in the pictures that she's a little 'holey'. That's ok.
The other thing about this is that she was supposed to be a yellow labrador retriever. ...She ended up looking like a rehash of Whinnie the Poo. But that's ok. She can be a bear...or dog... or both? Brog? Anyone? ...Bueller?
Anyway, hope you enjoy it, if you've come across this blog and she caught your eye. :)


Materials needed:
o
C hook (2.75mm)
o
DK weight yarn in three colors (yellow, blue,
and white)
o
Berocco Pure Pima DK was used in this project
o
You
can really use whatever yarn you want, worsted with the same size hook would
make it look ‘neater’ and probably what I’d do if I made her all over again!
o
Scrap black yarn
o
Yarn needle
o
4 buttons (1/2”)
Abbreviations used:
o
Ch – chain
o
Hdc – half double crochet
o
MR – magic ring
o
Sc – single crochet
o
Sl st – slip stitch
o
Ssc – shallow single crochet
o
Instead of placing your stitch as normal, go
into the vertical bars between the stitches. This stitch can be found on
youtube, in stitch dictionaries, and also on this blog where she has
conveniently posted pictures regarding this: http://knotsewcute.blogspot.com/2013/03/how-to-do-shallow-single-crochet.html
o
Rep – repeat
o
Sc2tog – decrease stitch
o
Shallow sc – a shallow version of single
crochet, as defined in “crochet stitches” book
o
Sk – skip a stitch
o
TO – tie off
Pattern notes:
o
This pattern is written in US terms.
o
The body of the puppy is worked in the round;
don’t join or turn. The only things worked flat are the dress and the ears.
o
If you have any questions, feel free to contact
me! Username is Malkyra on Ravelry.com! For other free patterns, check out my
patterns, or take a gander at my blog, cantoocrochet.blogspot.com.
Body
Beginning with the head,
In yellow,
Rd 1: MR 8 – 8
Rd 2: sc, 2sc, rep around –
12
Rd 3: sc in 2, 2sc, rep around – 16
Rd 4: sc in 3, 2sc, rep
around – 20
Rd 5: sc in 4, 2sc, rep
around – 24
Rd 6: sc in 5, 2sc, rep
around – 28
Rd 7: sc in 6, 2sc, rep
around – 32
Rd 8-9: sc in each – 32
Rd 10: sc in 7, 2sc, rep
around – 36
Rd 11-14 (4 rounds): sc in
each – 36
Rd 15: sc in 7, sc2tog, rep
around – 32
Rd 16: sc in 6, sc2tog, rep
around - 28
Rd 17: sc in 5, sc2tog, rep
around – 24
Rd 18: sc in 4, sc2tog, rep
around – 20
Rd 19: sc in 3, sc2tog, rep
around – 16
Rd 20: sc in each – 16
Rd 21: sc in 3, 2sc, rep
around – 20
Rd 22: sc in each – 20
Rd 23: sc in 4, 2sc, rep
around – 24
Rd 24: sc in each – 24
Rd 25: sc in 5, 2sc, rep
around – 28
Rd 26: sc in each – 28
Rd 27: sc in 6, 2sc, rep
around – 32
Rd 28: sc in each – 32
Rd 29: sc in 7, 2sc, rep
around – 36
Rd 30: sc in each – 36
Rd 31: sc in 8, rep around –
40
Rd 32: sc in 9, rep around –
44
Rd 33: Sc in 10, rep around
– 48
Change to blue,
Rd 34-37 (4 rounds): sc in
each – 48
Rd 38: sc in 10, sc2tog, rep
around – 44
Rd 39: sc in 9, sc2tog, rep
around – 40
Rd 40: sc in 8, sc2tog, rep
around – 36
Rd 41: sc, sc2tog, rep
around – 24
Place a marker here to help you
visualize the rounds. You are going to make the two legs now, one leg at a
time. The legs will be 12 inches around.
Rd 42: sk 12, sc in 13th
and on around – 12
Now just work these 12 stitches
for the leg, leaving the rest unworked. We’ll come back to it later.
Rd 43-47 (5 rounds): sc in
each – 12
Change to yellow,
Rd 48-57 (10 rounds): sc in
each – 12
Now to shape the foot,
Rd 58: sc, sc2tog twice, sc
twice, 2sc in 4, sc in last – 14
Rd 59: sc in 2, sc2tog
twice, sc twice, sc 2sc in 4, sc in last – 16
Rd 60: sc in each – 16
Rd 61: sc in 2, 2sc in 4, sc
in 4, sc2tog twice, sc in 2 – 14
Rd 62: sc, 2sc in 6, sc in
3, sc2tog twice, sc in 2 – 20
Rd 63: sc in each – 20
Rd 64: [sc, sc2tog] six
times, sc in last two – 14
Rd 65: [sc, sc2tog] twice,
sc around – 12
Rd 66: sc, 2sctog, rep
around – 8
Rd 67: sc2tog around – 4
Rd 68: sc2tog twice – 2
Rd 69: sk 1, sl st in next
to close. TO. Tuck in tail.
Now, to go back to the second
leg. Reattach in blue at the crotch stitch (the front of the doll is facing
you).
Continue from Rd 43 to end at Rd
60.
Arms (make 2)
Rd 1: MR 4 – 4
Rd 2: 2sc in each – 8
Rd 3: sc, 2sc, rep around –
12
Rd 4-23 (20 rounds): sc in
each – 12
Pinch the top together like a
seam, and sc 6 stitches across to close it. Leave a tail to attach it to the
body. Attach the arms at Round 21 of the body. I attached mine with 3 stitches
between the arms on the front side.
Nose
Rd 1: MR 4 – 4
Rd 2: 2sc in each – 8
Rd 3: sc, 2sc, rep around –
12
Rd 4: sc in each – 12
Rd 5: sc in 7, 2sc in 4 – 16
Rd 6-7: sc in each – 16
Attach at rows 12-13. This can be tricky for a beginner to get the
attachment to look ‘neat’ around the edge of the nose/as you stitch it to the
face. Planet June has some good instructions and videos on how to attach pieces
neatly. Might want to check this link out: http://www.planetjune.com/blog/joining-amigurumi/
Ears (make 2)
Ch 1 + 1 to turn
From here on out, chain 1 to turn
after each row.
Row 1: 2sc - 2
Row 2: 2sc in 2 – 4
Row 3-5 (3 rows): sc in each
– 4
Row 6: 2sc, sc in 2, 2sc – 6
Row 7: sc in each – 6
The ear is now shaped. To give it
a finished look, sc around the edge in each stitch, placing 3sc in the ‘tip’ of
the ear (the row 1 stitch).
TO. Attach to head. I pinned the
tip of the ear down to get it to ‘flop’.
Tail
Rd 1: MR 5 – 5
Rd 2: [sc, 2sc] twice, sc in
last – 7
Rd 3-7 (5 rounds): sc in
each – 7
Rd 8: [sc in 2, 2sc] twice,
sc in last – 9
Rd 9: [sc in 3, 2sc] twice,
sc in last – 11
Rd 10-18 (9 rounds): sc in
each – 11
TO. Attach to body.
Dress
Note: This dress uses a shallow single crochet stitch (ssc). See Notes
on first page for description.
In blue,
Ch 24 + 1 to turn,
Row 1: sc in each – 24
Row 2: ch 3, sk 3, sc in 21 (this makes a button hole) – 21 + 3 ch
Row 3: [sc in 4, 2sc in next] four times, sc in 4 – 28
Row 4: sc in 6, 2sc, rep around – 32
Row 5: sc in 7, 2sc, rep around – 36
Row 6: sc in 8, 2sc, rep around – 40
Row 7: sc in 9, 2sc, rep around – 44
Row 8: [sc in 7, 2sc] five times, sc in 4 – 48
Row 9: sc in each – 48
Switch to white,
Row 10-13 (4 rows): ssc in each – 48
Switch to blue,
Row 14: ssc in 4, ssc2tog, rep around – 40
Row 15: ssc in each – 40
Switch to white,
Row 16-19 (4 rows): ssc in each – 40
Row 20: [sc, hdc] in first stitch, [hdc, sc] in next stitch. Repeat
this across. TO. Tuck in all tails.
Shoulder Straps (make 2)
In blue,
Ch 15 + 1 to turn
Row 1: sc in each – 15
Row 2: sc, ch 2, sk 2, sc in 12. TO.
Attach white at the beginning chain. Hdc in each, placing 2hdc in
corner edges. Be careful to hdc in the ch’s made for the button hole. Tuck in
all tails.
Attach straps to dress, pinning them in place the dress is on the doll
to know where to place your buttons.
Using black yarn, embroider on the nose and eyes. I used a 'satin stitch' for the nose, although maybe a heart shape would look more doggy. Whatever! Here's a link, in case you aren't sure what I'm talking about or haven't done this before: http://sublimestitching.com/pages/how-to-satin-stitch
Enjoy!

I love that your so talented and just go with flow I think she's adorable you have the designs and you don't even know it your not a diva about things but they are perfect sometimes I get tired of reading designers bragging about how perfect thier design is let us the buyer and the user of the pattern give our opinion they obviously already know it's perfect doesn't it mean more from the consumer anyways what I mean is it's darn cute
ReplyDelete